Posted on 2025-05-01
Introduction
This guide outlines the steps to set up an OpenVPN server on Ubuntu 24.04, including certificate management, server configuration, firewall setup, and client provisioning.
NOTES:
We are logged in to our server as sudo-user, therefore all activities are taking place in /home/sudo-user directory. This is slightly different to official instructions on OpenVPN installation at Ubuntu web-site https://documentation.ubuntu.com/server/how-to/security/install-openvpn/
Step 1: Install OpenVPN and Easy-RSA
| $ sudo apt update $ sudo apt install openvpn easy-rsa -y |
Step 2: Initialize the Public Key Infrastructure (PKI)
DEVIATION comes into play here
The command $ make-cadir ~/openvpn-ca creates the folder in /home/sudo-user folder.. This is a nuance and the subsequent instructions still work, so can be ignored.
Also note that we use our favourite nano editor, so it’s $ sudo nano vars
| $ make-cadir ~/openvpn-ca $ cd ~/openvpn-ca $ vi vars |
Edit the vars file with appropriate values:
NOTE:
despite editing the vars file and entering our unique details, during subsequent (below) activations, we are still asked to enter these as if a default set (in the vars file) doesn’t exist…. ??
Also, it was a requirement to enter a passphrase and we have used 6-character pil numarasi for this.
| set_var EASYRSA_REQ_COUNTRY “TW” set_var EASYRSA_REQ_PROVINCE “Taipei” set_var EASYRSA_REQ_CITY “Taipei” set_var EASYRSA_REQ_ORG “MyVPN” set_var EASYRSA_REQ_EMAIL “admin@example.com” set_var EASYRSA_REQ_OU “IT” |
Initialize the PKI and build the Certificate Authority (CA):
| $ ./easyrsa init-pki $ ./easyrsa build-ca |
If you see an error like
Can't load /home/$USER/openvpn-ca/pki/.rnd into RNG, run:
$ openssl rand -writerand pki/.rnd and retry
./easyrsa build-ca.
Step 3: Generate Server Certificate and Keys
| $ ./easyrsa gen-req server nopass $ ./easyrsa sign-req server server $ ./easyrsa gen-dh $ openvpn –genkey secret ta.key |
Step 4: Deploy Server Keys and Certificates
| $ sudo cp pki/ca.crt pki/private/server.key pki/issued/server.crt pki/dh.pem ta.key /etc/openvpn/server/ |
️ Step 5: Configure the OpenVPN Server
Create the configuration file:
| $ sudo vi /etc/openvpn/server/server.conf |
Paste the following:
| port 1194 proto udp dev tun ca ca.crt cert server.crt key server.key dh dh.pem auth SHA256 tls-auth ta.key 0 topology subnet server 10.8.0.0 255.255.255.0 push “redirect-gateway def1 bypass-dhcp” push “dhcp-option DNS 1.1.1.1” push “dhcp-option DNS 8.8.8.8” keepalive 10 120 cipher AES-256-CBC user nobody group nogroup persist-key persist-tun status openvpn-status.log verb 3 explicit-exit-notify 1 |
Step 6: Enable IP Forwarding and Configure UFW
NOTE
As implied, sysctl.conf file is in the /etc/ folder
Edit sysctl.conf, and ensure the following line is uncommented:
| $ sudo vi /etc/sysctl.conf … net.ipv4.ip_forward=1 … |
Apply changes:
| $ sudo sysctl -p |
Configure firewall:
| $ sudo ufw allow 1194/udp $ sudo ufw allow OpenSSH |
Edit UFW NAT rules:
| $ sudo vi /etc/ufw/before.rules |
Add above *filter section:
| *nat :POSTROUTING ACCEPT [0:0] -A POSTROUTING -s 10.8.0.0/24 -o eth0 -j MASQUERADE COMMIT |
Replace
eth0with your actual network interface. Check it using:
ip route
Edit UFW default settings:
| $ sudo vi /etc/default/ufw # Set DEFAULT_FORWARD_POLICY to ACCEPT … DEFAULT_FORWARD_POLICY=”ACCEPT” … |
Restart UFW:
| $ sudo ufw disable $ sudo ufw enable |
Step 7: Start OpenVPN Service
| $ sudo systemctl start openvpn-server@server $ sudo systemctl enable openvpn-server@server $ sudo systemctl status openvpn-server@server |
Step 8: Generate Client Certificate
| $ cd ~/openvpn-ca $ ./easyrsa gen-req client1 nopass $ ./easyrsa sign-req client client1 |
Prepare these files for client use:
NOTE
I think the above means : send/transfer these files to the client device
~/openvpn-ca/pki/ca.crt~/openvpn-ca/pki/issued/client1.crt~/openvpn-ca/pki/private/client1.key~/openvpn-ca/ta.key
Step 9: Create Client Configuration File
Create client1.ovpn with the following content:
| client dev tun proto udp #remote your.server.ip 1194 remote 62.31.247.108 1194 resolv-retry infinite nobind persist-key persist-tun remote-cert-tls server auth SHA256 cipher AES-256-CBC key-direction 1 verb 3 <ca> # Paste contents of ca.crt here </ca> <cert> # Paste contents of client1.crt here </cert> <key> # Paste contents of client1.key here </key> <tls-auth> # Paste contents of ta.key here </tls-auth> |
Import this .ovpn file into your OpenVPN client application.
Completion
Your OpenVPN server is now up and running on Ubuntu 24.04.
- Post author: Holey
- Post link: https://blog.holey.cc/2025/05/01/ubuntu-24-04-openvpn-setup/
- Copyright Notice: All articles in this blog are licensed under BY-NC-SA unless stating ad
https://blog.holey.cc/2025/05/01/ubuntu-24-04-openvpn-setup
Install Client OpenVPN App
First, head over to OpenVPN.org and download (Windows) OVPN App
For Apple platforms, we can download the official OpenVPN Client from here
Install it and import your client.OVPN file into it…
Verification Tests
After importing the client.OVPN file, we can see the app running with VPN enabled and our ‘exposed/ IP address is not the one on out local machine but the VPN Server IP address…
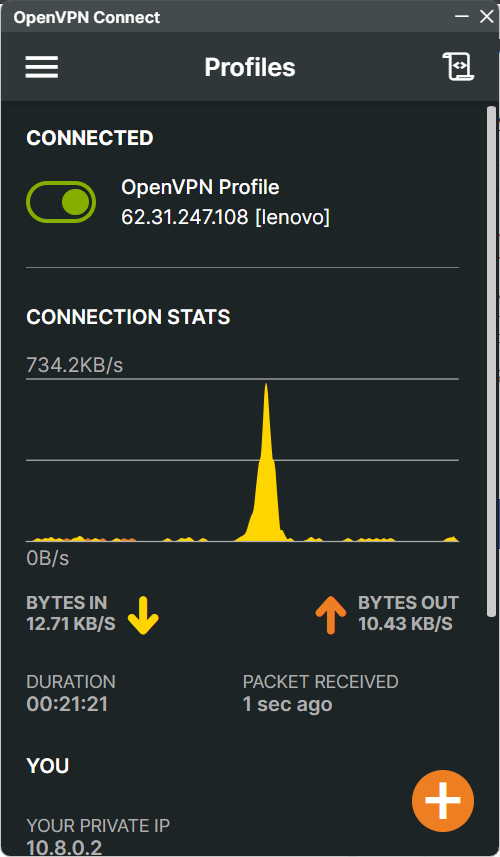
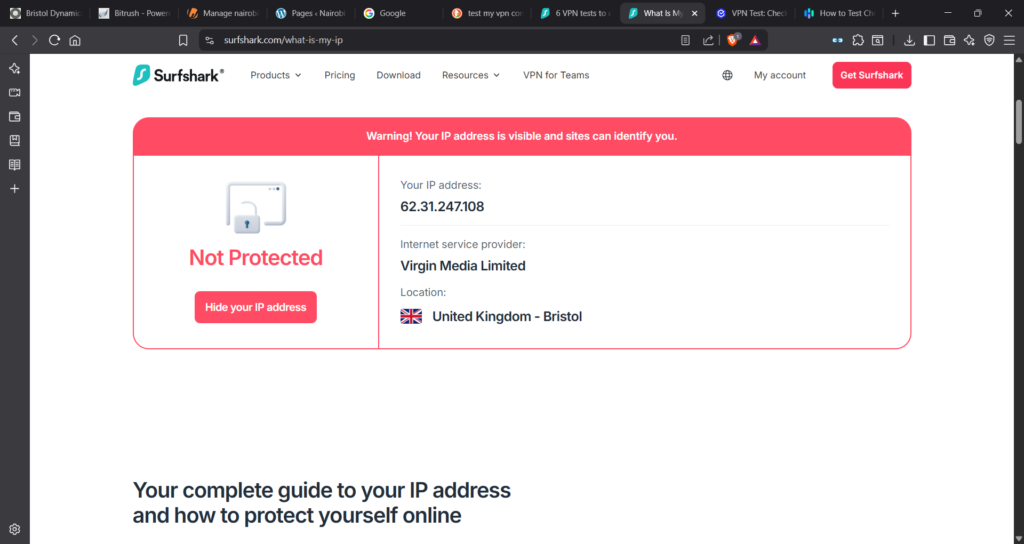
This is consistent through tests carried out with independent web sites, several are shown below;
This is SurfShark’s conclusion (link to web-site)… Note, the IP address is the VPN Server IP and not my laptop!
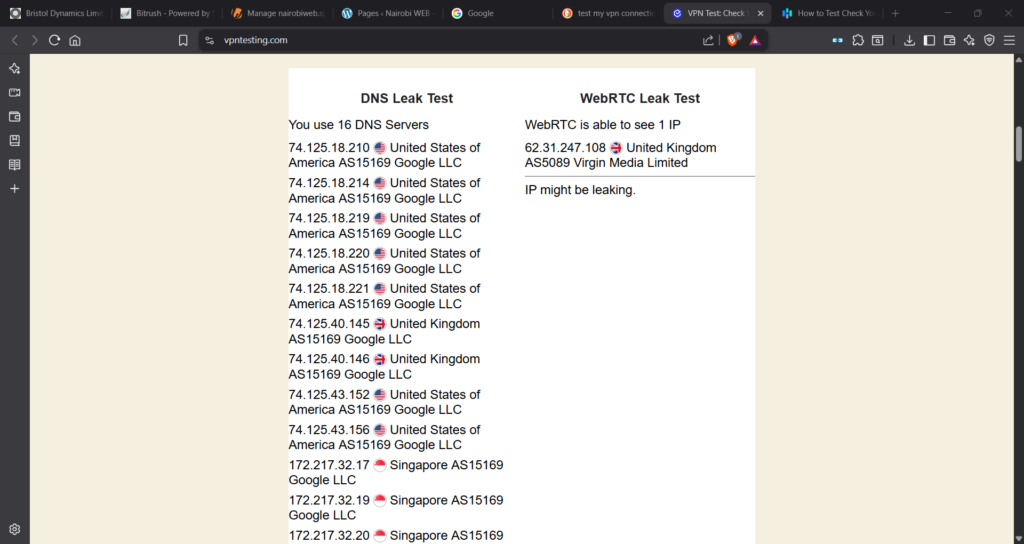
Here’s another indy test. Again it ‘detects’ VPN Server address!!
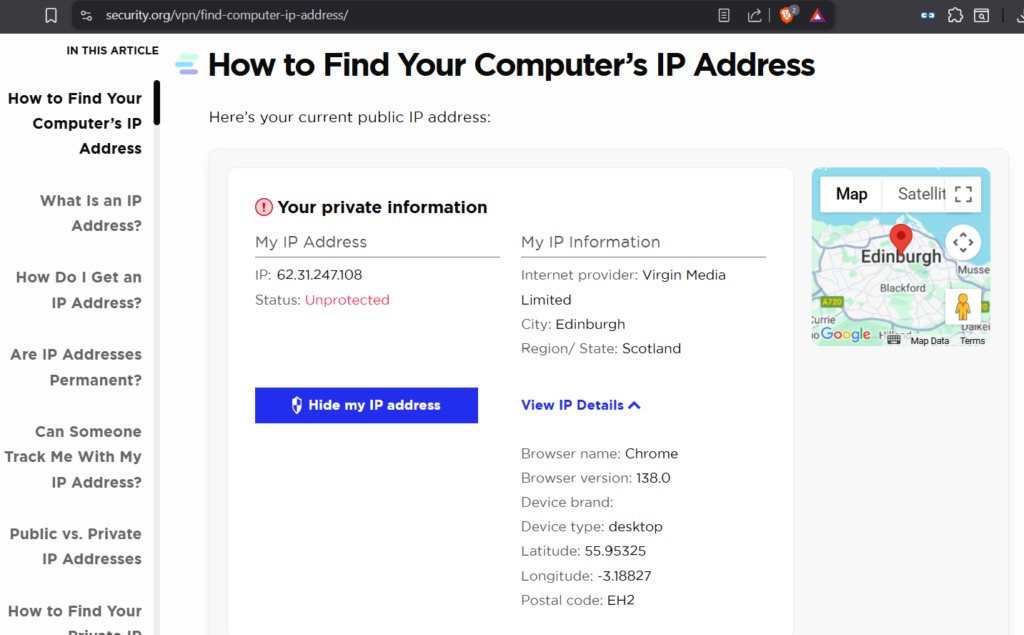
And other details (allegedly) extracted from our machine…
Conclusions
The VPN Server is certainly working….
We note from a Reddit chat platform that the security can be further tightened. And of course, that is a task worth pursuing. For now, we have a first order VPN setup.
Clearly we have only created one VPN license or certificate (for our laptop). We need to do this for all other computers including our Smartphones. To this end, we need to somehow automate the proess of creating certificates or client.OVPN files. That is definitely worth investigating.